Tumonz has built-in functions to keep the program and data up to date – below are a few usefull tips if you want to do a manual update. Click on any image to enlarge it.
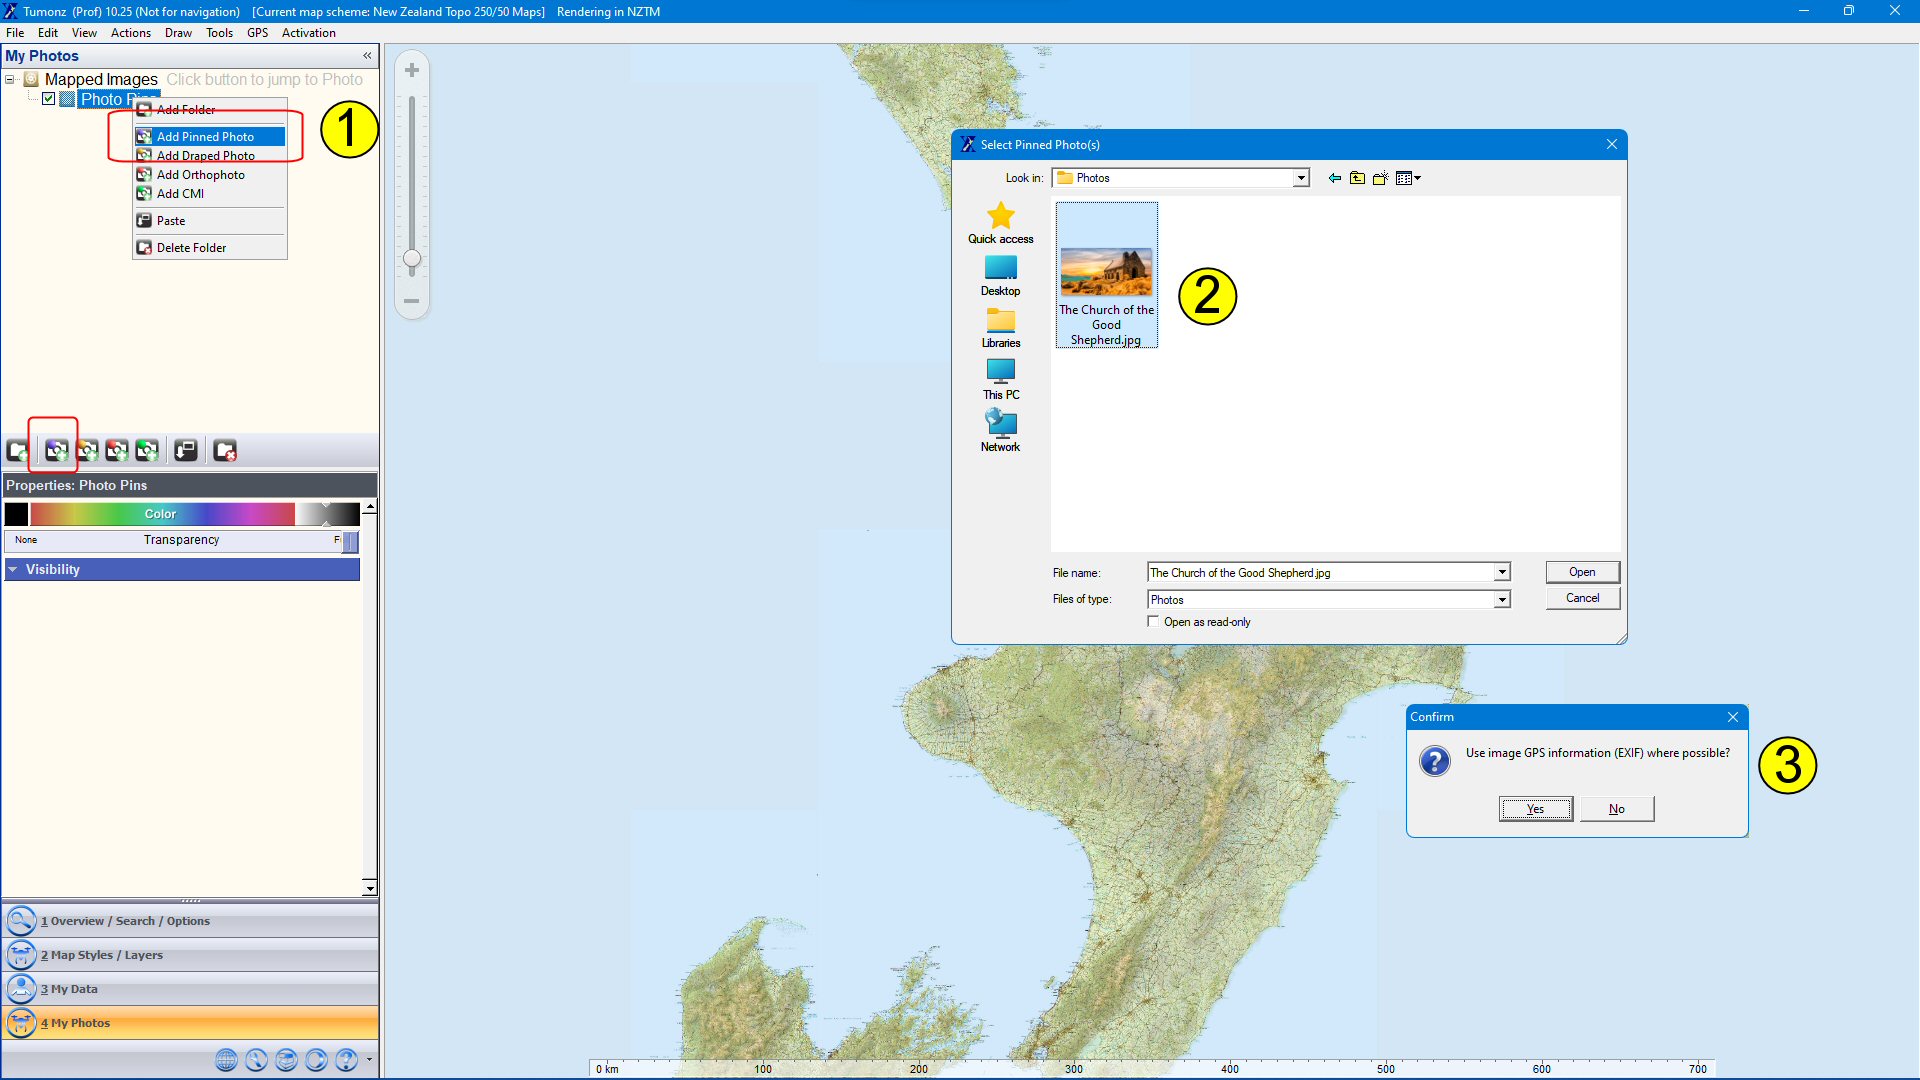
Right-click on the new folder node and choose Add Pinned Photo (1), or click the Add Pinned Photo button on the Action Bar. Choose the photo(s) you want to add (2), and click Yes when asked if you want to use the photo GPS information (3). If you choose No the photos will be pinned in the middle of the current map view.
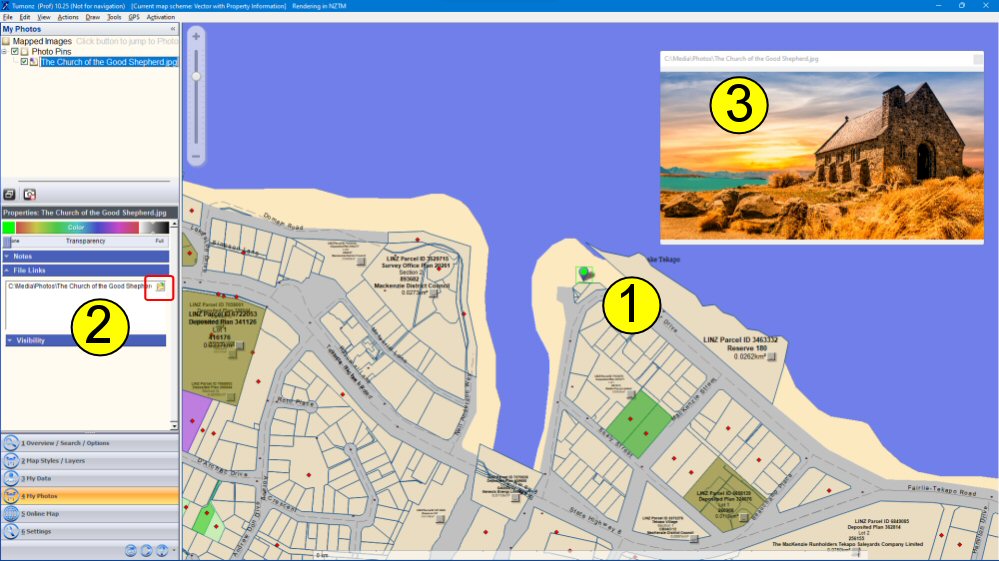
The map will automatically centre on the new pinned photo (1), and the image file will be the first entry in the File Links list. You can Ctrl + Left-click on the View File button for the image file (2) to show the image in the internal viewer (3), or just Left-click on the View File button to show the image in the default viewer.
Enter your unique Product/CD Key and the press Quick Internet Registration to complete the registration.
The registration will complete and present you with the associated keys for these installations. You only have to keep a copy of your Product Key – the other keys are specific to your machine and we will keep a record for you. This completes the once-off registration process.
If you have Tumonz 8 and earlier (or want to activate an installation that does not have internet access), you have to follow the manual registration process. Enter your unique Product/CD Key and then press Finish Registration to complete the registration.
Tumonz will generate a License Key for this installation – you can copy/paste this key (or just write it down and type it in) on your website (Support | Activation) to get the associated Activation Key.
After you’ve entered the License Key on our website and pressed the Activate button, you can copy/paste the Activation Key (or just write it down and type it in) to enter it into the final registration screen in Tumonz.
Enter the Activation Key and press Complete Registration to finish the registration process – you will be presented with a final screen similar to the Quick Internet registration process above.
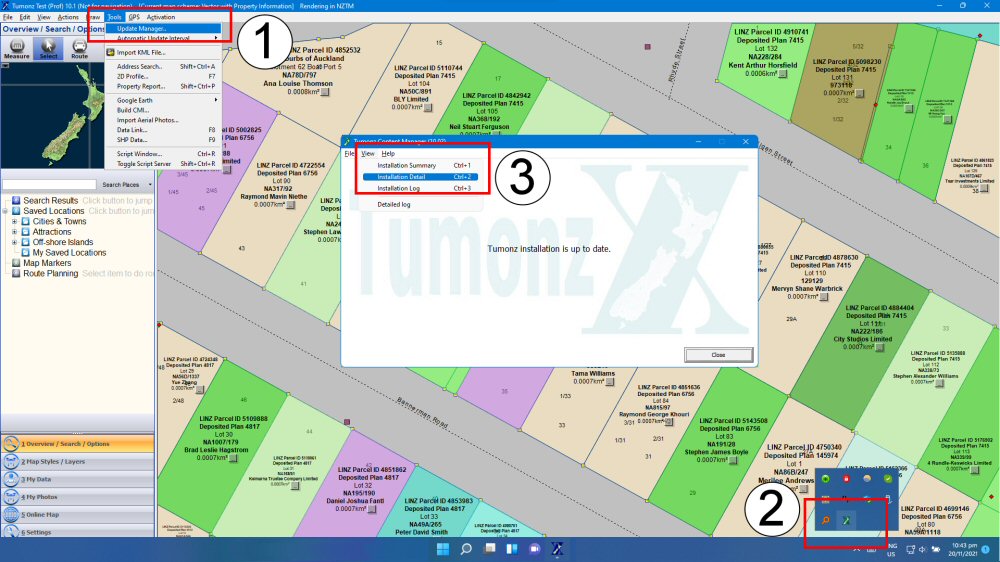
If the property information is not showing, you can use the Update/Content Manager in the Tools menu (1). The Update Manager will show unless it is already open in the icon tray (2). In the Update Manager you can select the Installation Detail option to see the installed version details.
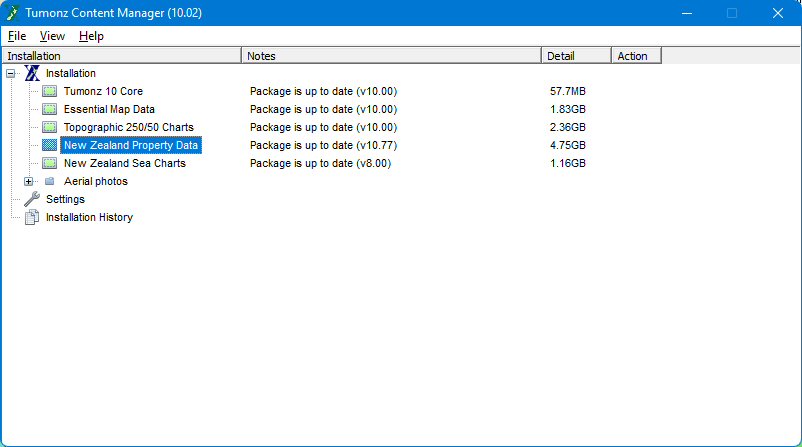
The Installation Detail view in the Update Manager shows the version of each installed dataset.